Simple Shading Techniques: Hatching, Blending and Value
Give flat sketches light and shadow with a five-step value scale, four ways to lay tone and a step-by-step shaded sphere with a highlight, core shadow and cast shadow.

This drawing at a glance
What you need
- HB pencil
- 2B or 4B pencil
- Soft eraser
- Paper blending stump or tissue
- Scrap sheet of paper
- Plain paper
An outline tells you what a thing is, but not what shape it is. A plain circle could be a plate, a ball or a hole in the ground. Add light and shadow, and the same circle becomes a sphere that looks solid enough to pick up.
The simple shading techniques in this guide need only a pencil, paper and some patience with light layers. You will meet one idea (value), four ways to put tone on the page, and a sphere to practice them on.
Value: the idea behind all shading
Value is how light or dark a tone is, from the white of the paper to the darkest mark your pencil can make. Drawings that look flat usually stay within two or three values that sit close together. Drawings that look solid use the whole range.
Make a five-step value scale
- Draw a row of five boxes, each about 1 in (2.5 cm) square.
- Leave the first box white.
- Fill the last box as dark as a 2B or 4B pencil will go without denting the paper.
- Fill the middle box with a gray halfway between the two.
- Fill the remaining two boxes so that every step is an even jump.
Softer pencils reach dark values with less pressure, which is why a 2B or 4B is useful here. The guide to basic drawing supplies explains the grades in more detail.
Four ways to lay down tone
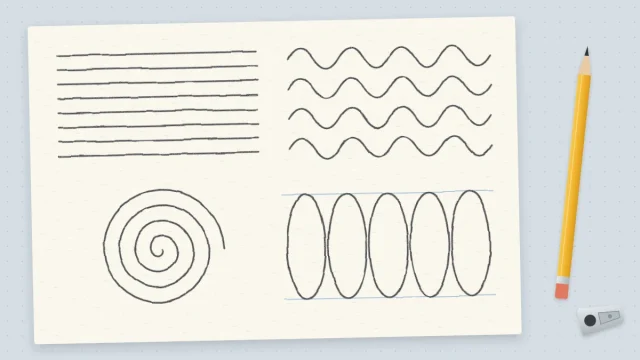
- Hatching. Parallel lines drawn close together. Closer or heavier lines read as a darker value.
- Cross-hatching. A second set of lines laid across the first at an angle. Each new layer darkens the tone.
- Smooth shading. Tone laid with the side of the pencil point in small overlapping strokes, so no single line shows.
- Blending. Smooth shading that is then rubbed gently with a paper blending stump or a folded tissue for a soft, even finish.

None of these is better than the others. Hatching and cross-hatching keep a sketch lively and are easy to control. Smooth shading and blending suit rounded, polished surfaces. Fill a small box with each method and see which feels natural.
Common mistake
Blending with a fingertip. Skin leaves a slightly greasy patch that grabs graphite unevenly and is hard to erase. A stump or tissue gives a cleaner result.
Pick one light direction
Before you shade anything, decide where the light comes from and keep to it. Top left is a comfortable choice. Every surface that faces the light stays pale, every surface that turns away gets darker, and every shadow on the ground falls on the opposite side.
Mixed light directions are the most common reason shading looks confusing, even when each object is shaded carefully.
The five parts of light and shadow on a sphere
- Highlight: the brightest spot, facing the light. Leave it as bare paper.
- Midtone: the light gray that covers most of the form as it begins to turn away.
- Core shadow: the darkest band on the object itself, where the light cannot reach.
- Reflected light: a slightly paler strip at the far edge, lit by light bouncing up from the table.
- Cast shadow: the shadow the object throws onto the surface beneath it.
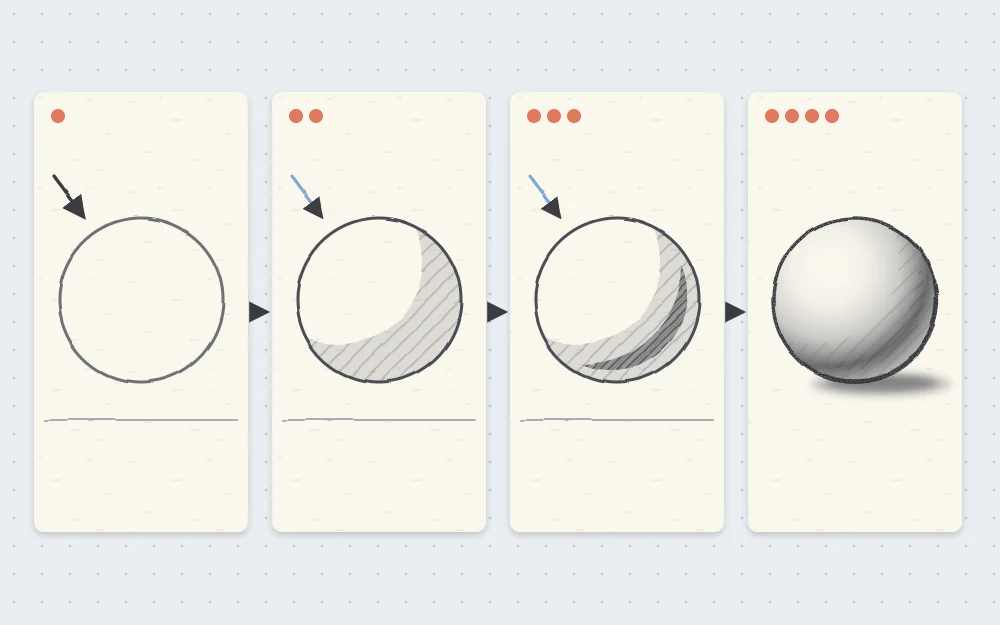
Shade a sphere step by step
- Draw the circle. With an HB pencil, lightly draw a circle about 3 in (8 cm) across. Make a small arrow outside it at the top left to remind you where the light comes from.
- Lay a light tone. Using the side of the pencil, cover the shadow side, roughly the lower right two-thirds of the circle, with one even light gray. Curve your strokes to follow the round form. Leave the upper left untouched.
- Add the core shadow. With a 2B, build a darker crescent-shaped band on the lower right. Set it a little inside the edge, not on it. At its widest it should be about one-fifth of the sphere’s width.
- Keep the reflected light. Leave the thin strip between the core shadow and the edge slightly paler than the band. It should still be darker than anything on the lit side.
- Add the cast shadow. Draw a flattened ellipse on the ground at the lower right, about as long as the sphere is wide. Make it darkest where it touches the sphere and let it fade outward.
- Soften the steps. Go back over the borders between values with light strokes or a stump so one tone melts into the next. Lift any gray from the highlight with an eraser.
Build tone in layers and keep the page clean
Dark values come from several light layers, not from pressing hard. Heavy pressure flattens the paper’s surface, leaves a shine and cannot be erased cleanly. Three or four gentle passes give a deeper, more even tone.
Graphite also travels. Rest your drawing hand on a scrap sheet of paper so it never touches finished areas, and if you are right-handed, work from the top left toward the bottom right (the reverse if you are left-handed). Soft pencils smudge more than hard ones, so add the darkest darks last.
If the shading looks wrong
- It still looks flat. The darks are too timid. Compare your core shadow with the darkest box on your value scale.
- It looks patchy. The strokes are too far apart or too heavy. Lighten the pressure and overlap them more.
- The sphere looks like a disk with a dark rim. The core shadow is sitting on the outline. Move it inward and leave the reflected light.
- The object seems to float. The cast shadow is missing or does not touch the base.
What to shade next
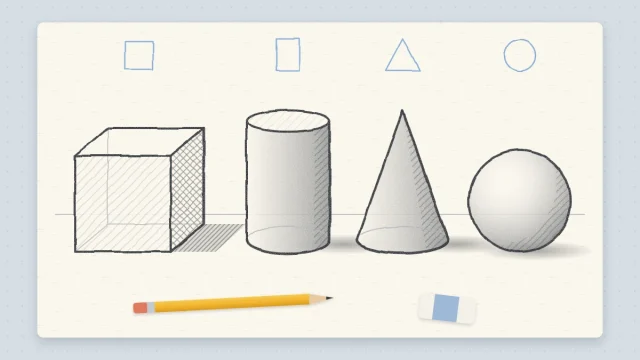
The same five parts appear on every rounded object, only stretched or bent. Try them on the other solid forms in the guide to drawing a cube, cylinder and cone, where flat sides each take a single value. Then move to something real from the kitchen: an apple or a pear is a slightly lumpy sphere, and the fruit tutorial walks through it.
Early shading is usually uneven and a little gray overall. Keep making value scales, and your eye for small differences in tone improves along with your control of the pencil.
Frequently asked questions
Which pencil is best for shading?
A 2B is a good all-round choice because it gives a wide range of grays with light pressure. Add a 4B when you want deeper darks, and keep an HB for the palest tones. Softer grades smudge more easily, so save them for the final layers.
Should I blend my shading or leave the pencil strokes visible?
Either is fine, and it depends on the look you want. Visible hatching gives a sketch energy and is easier to keep clean. Blending suits smooth surfaces such as fruit or ceramic. Many drawings use both: blended tone on the object and loose hatching in the background.
How do I stop smudging my drawing while I shade?
Place a clean scrap of paper under your drawing hand and move it as you work, so your skin never rubs the graphite. Shade from the side opposite your drawing hand toward it, and leave the softest, darkest pencil until the end.