Drawing Supplies for Beginners: What You Actually Need
The short, honest list of tools for a first sketch: three graphite pencils, an eraser, a sharpener and plain paper. Learn what H and B mean, which extras can wait and how to hold the pencil.
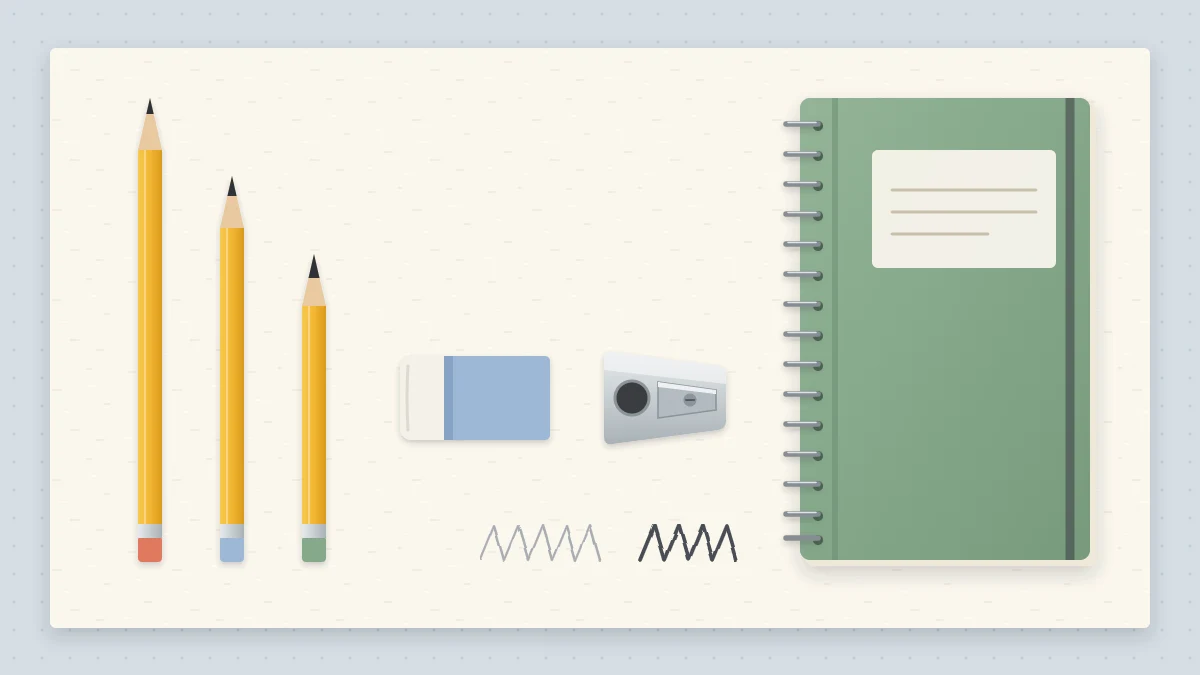
Art store shelves hold hundreds of pencils, pads and gadgets, and almost none of them matter on day one. The honest list of drawing supplies for beginners fits in one hand: a few graphite pencils, an eraser, a sharpener and some plain paper.
Below is what each tool does, how to read the letters printed on a pencil, which extras are pleasant but optional, and how to hold the pencil once you have it. Everything is described by type, so you can use whatever is already in a drawer at home.
The minimum kit
These five items cover every lesson on this site. If you are still deciding whether drawing is for you, the plan in how to start drawing works with only the first pencil on the list.
- HB pencil. The everyday middle grade. It makes a light, clean line that is ideal for construction lines and first sketches.
- 2B pencil. Softer and darker. Use it for final outlines and most shading.
- 4B pencil. Softer again, for the darkest shadows. Useful, but the last of the three to add.
- Soft eraser. A white vinyl eraser removes light graphite without tearing the paper.
- Sharpener. A small metal hand sharpener is enough. A sharp point gives you thin lines; a slightly worn point gives broader, softer ones.
- Plain paper. Printer paper or a simple sketchbook.
What H and B mean on a pencil
The letters describe the graphite core. H stands for hard: the line is pale and crisp, and the point stays sharp for longer. B stands for black: the core is softer, so it leaves more graphite on the page and the line is darker. The number shows how far the pencil sits from the middle, so a 4B is softer and darker than a 2B, and a 2H is harder and lighter than an H. If you are curious about where the scale comes from, there is a clear explanation of how graphite pencils are graded.
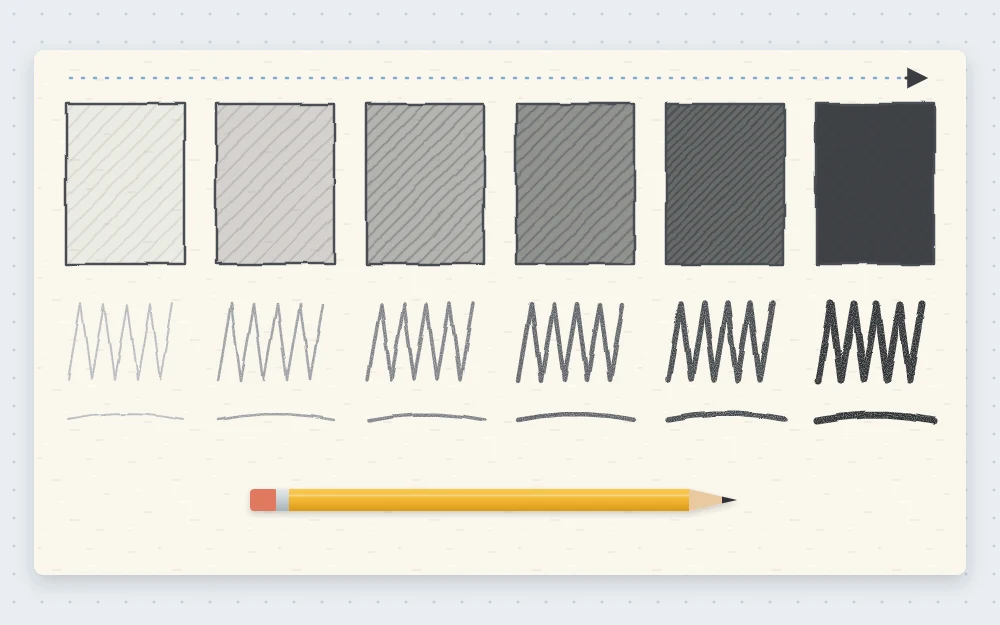
| Grade | Mark it makes | Best used for |
|---|---|---|
| 2H or H | Pale, thin, hard to smudge | Very faint guidelines; optional |
| HB | Light to medium gray | Construction lines and sketching |
| 2B | Medium to dark gray | Final lines and general shading |
| 4B | Dark, soft, smudges easily | Deep shadows and strong accents |
Two practical points follow from this. Soft pencils smudge more, so keep your hand off finished areas. Hard pencils can dent the paper if you press, so use them with a light touch.
Erasers and sharpeners
An eraser is a drawing tool as much as a correcting tool. The soft white kind handles everyday changes. Cut or wear one corner to an edge and you can lift a thin line without disturbing its neighbors.
Brush crumbs away with a clean tissue or a soft brush rather than the side of your hand, which drags graphite across the page. Erasing works best on lines that were drawn lightly; a line pressed hard into the paper leaves a groove that stays visible no matter what you rub it with.
Empty the sharpener often. A blade clogged with shavings chews the wood and snaps soft cores, and 4B points are fragile to begin with.
Sketchbook or loose paper
Both are fine, and they suit different moods.
- Loose printer paper is smooth, plentiful and free of pressure. It is ideal for warm-ups and drills, where you want to fill pages without worrying about wasting them.
- A sketchbook keeps your pages in order, so you can flip back and see how your lines have changed. Look for plain, unlined pages of medium weight with a slight texture, often called tooth, which grips graphite and makes shading more even.
A size close to a sheet of letter paper, or half that for carrying around, is comfortable. Very small books cramp your arm, and very large ones can feel daunting. A spiral binding lets the book lie flat.
Optional extras and what can wait
None of these are needed in the first weeks. Add them one at a time when you notice a specific job they would do.
- Kneaded eraser. A soft, putty-like eraser you can shape into a point. Press it on the page to lighten an area or lift a highlight without rubbing.
- Blending stump. A tightly rolled paper stick for smoothing graphite into soft tone. A folded tissue does a similar job. The guide to simple shading techniques explains when blending helps and when hatching is the better choice.
- Fine black pen. For going over a finished pencil sketch with a permanent line.
- Ruler. Handy for a ground line or for checking a vertical edge. Draw most lines freehand, though, so your hand keeps learning.
Large pencil sets, colored pencils, charcoal, special papers and drawing boards can all wait. More tools mean more decisions, and decisions are not what a beginner needs more of.
How to hold the pencil
The way you hold the pencil changes the line as much as the grade does. Two grips cover nearly everything.
The loose sketching grip
Hold the pencil farther back, about 2 to 3 in (5 to 8 cm) from the tip, with a relaxed hand. Move from the elbow and shoulder instead of the fingers. This grip keeps pressure low, so it suits construction lines, big shapes and long curves.
The detail grip
Hold the pencil near the tip, the way you write. It gives firm control over small movements, which is what you need for an eye, a window pane or a crisp final edge. Because it is easy to press too hard this way, save it for late in a sketch.
Common mistake
Using the writing grip for the whole drawing. It leads to small, tight, dark sketches that are hard to correct. Start loose and far back, then move your fingers closer to the tip only for the last details.
Looking after your kit
Graphite cores crack if a pencil is dropped, and a cracked core falls out in pieces when you sharpen it. Keep pencils in a case or a cup. Store finished pages flat, with a clean sheet between soft-pencil drawings so they do not rub off on each other.
Once you have the kit, the tools stop being the question and habits take over. A quick read through the most common beginner mistakes and their fixes will help you get more from the pencils you already own.
Frequently asked questions
Can I learn to draw with just a regular pencil?
Yes. An ordinary HB writing pencil and printer paper are enough for lines, shapes and light shading. You will only miss the very dark tones, which a softer 2B or 4B pencil reaches more easily. Add those when your shading starts to look pale and you want deeper shadows.
What is the difference between HB and 2B pencils?
HB is the middle grade: fairly firm, with a light to medium gray line that erases cleanly. A 2B has a softer core that leaves more graphite, so its line is darker and smoother but smudges more easily. Sketch lightly with HB, then finish and shade with 2B.
Do I need a special sketchbook to begin drawing?
No. Plain printer paper is fine for practice and costs little to fill. A sketchbook becomes useful when you want to keep pages together and look back at earlier work. If you choose one, pick plain pages with a slight texture and a binding that lies flat.