Drawing Basic Shapes: The Building Blocks of Every Sketch
Practice the five shapes behind every sketch, learn to ghost a stroke before the pencil lands, and build a simple teapot from a circle, an oval and a few curves.

This drawing at a glance
What you need
- HB pencil
- 2B pencil
- Soft eraser
- Sharpener
- Plain paper
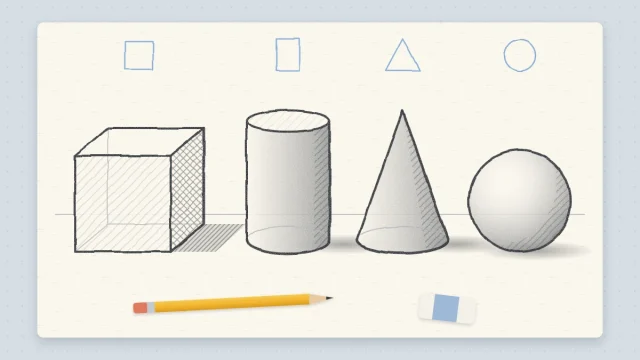
Look at almost any object for long enough and it breaks down into a few plain shapes. A lamp is a triangle on a rectangle. A bird is an oval with a circle at one end. Drawing basic shapes well is therefore not a warm-up you leave behind; it is the method working artists use to start nearly every sketch.
This lesson covers the five shapes worth practicing, how to draw each one lightly with your whole arm, and how to join them into a construction sketch. The worked example is a teapot built from a circle, an oval and a few curves.
The five shapes to practice
- Circle. The base for heads, fruit, wheels and anything round.
- Oval. A stretched circle, used for bodies, leaves, lids and eggs.
- Square. Four equal sides, the start of boxes, houses and windows.
- Rectangle. A stretched square, for trunks, books, doors and bottles.
- Triangle. For roofs, ears, tails, sails and beaks.
How to draw each shape lightly
Use an HB pencil and hold it loosely, a little farther back than for writing. Keep your wrist fairly still and let the movement come from your elbow and shoulder. Finger movements are fine for small details, but they make large shapes cramped and lumpy.
Ghost the motion first
Ghosting means rehearsing a stroke in the air. Hover the pencil point just above the paper and make the movement two or three times: around the circle, or along the side of the square. When the motion feels smooth, lower the pencil without stopping and let it touch the page. The line arrives with the rhythm already in it.
Shape by shape
- Circles and ovals: ghost, then go around twice in one continuous motion. Two light passes average out into a rounder shape than one careful, slow pass.
- Squares and rectangles: draw the two vertical sides first, then join them top and bottom. Lines may overlap a little at the corners; that is better than gaps.
- Triangles: draw the base, mark a light dot for the top point above its middle, then join the dot to each end of the base.
Draw each shape about 2 in (5 cm) across to begin with, large enough that your arm has to move. Keep every line light. These are construction lines, and they need to erase cleanly later or sit quietly under the final drawing.
Check a shape by turning the page
Your eye gets used to a shape while you draw it, and its faults become invisible. Turn the paper a quarter turn, or upside down, and look again. A circle with a flat side, a square that leans, or a triangle with its point off to one side shows up at once.
A few common faults have simple cures:
- If an oval is pointed at the ends, round the corners as if it were a running track.
- If a circle looks like an egg, you probably slowed down on one side. Speed up slightly and go around again.
- If a square looks like a rectangle, compare the height with the width before you close it.
Combine shapes into a teapot
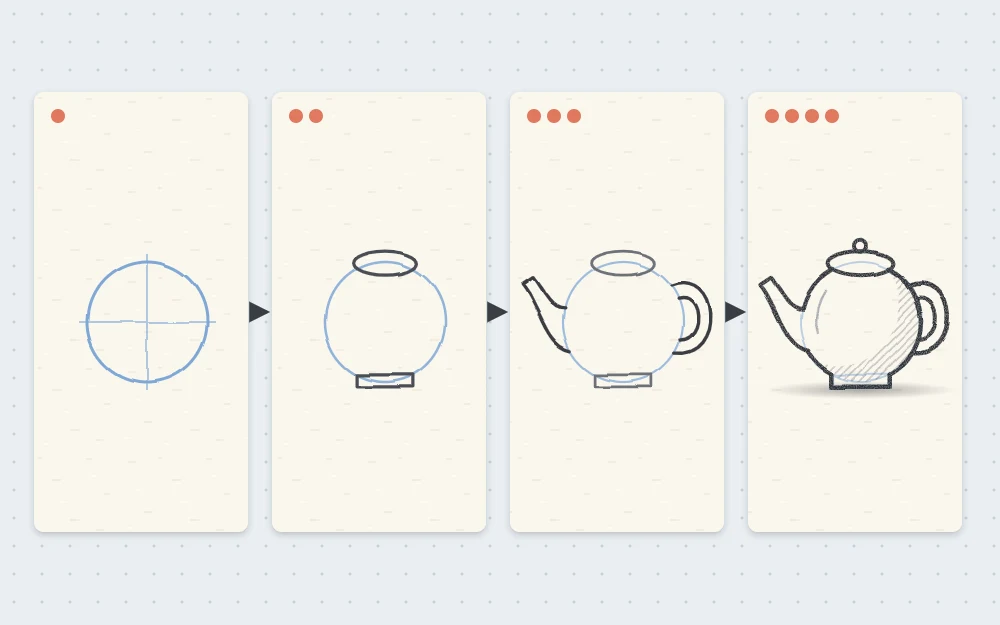
A construction sketch is a light framework of simple shapes that you refine into the finished outline. Here is a teapot in side view, built in four stages. Work lightly with the HB until the last step.
- Draw the body. Make a large circle, about 3 in (8 cm) across, in the middle of your page. This is the round belly of the pot.
- Add the lid. Draw a flat oval sitting across the top of the circle, overlapping it slightly. It should be about half as wide as the body. Add a tiny circle on top of it for the knob if you like.
- Add the base. Draw a small, low rectangle under the circle, overlapping its bottom edge. Make it about the same width as the lid, so the pot looks steady.
- Add the spout. On the right side, start a little below the middle of the body and draw two curved lines that sweep outward and upward, ending level with the top of the circle. The spout is wider where it joins the body and narrower at the tip.
- Add the handle. On the left side, draw a loop like a large letter C turned to face the pot. Its ends touch the body near the top and just below the middle. Draw a second, smaller curve inside it to give the handle thickness.
- Draw the final outline. Switch to a 2B pencil and go around the outside of the whole pot with one clean, darker line, smoothing the places where the shapes meet. Leave the construction lines faint inside, or lift them gently with an eraser.
Tip
Proportion check: the spout tip and the top of the handle should both reach about as high as the top of the body. If the spout ends lower, the pot looks as though it could not be filled.
Getting the sizes right
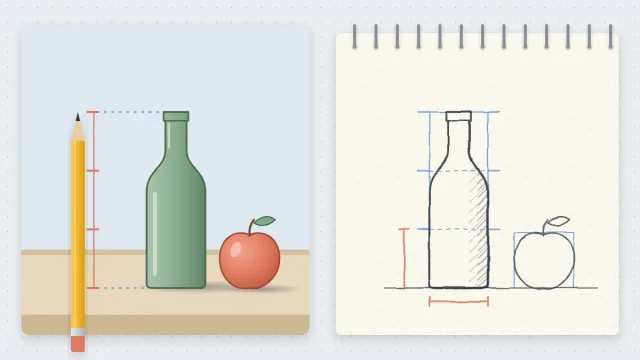
Shapes alone are not enough; their sizes compared with one another matter just as much. Before you add a new shape, ask how it relates to one you have already drawn. Is the lid half the width of the body, or a third? Does the handle stick out as far as the spout?
This habit of comparing one part with another is called proportion, and it has its own lesson on measuring proportions by eye.
Find the shapes in other subjects
Practice spotting shapes before you draw. A simple house is a square with a triangle on top. A fish is an oval with a triangle for a tail. A tree is a tall rectangle with a circle resting on it.
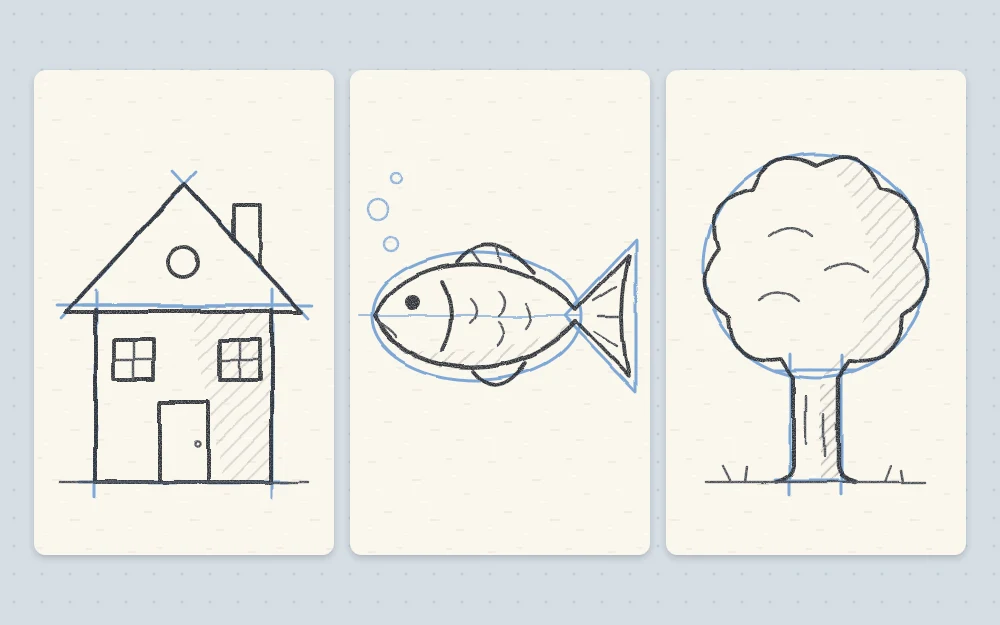
Animals work the same way. The lesson on drawing a sitting cat starts with nothing more than a circle and a pear-shaped oval.
What to try next
Once flat shapes feel comfortable, change the teapot: a taller oval body, a square body, a longer spout. Each version uses the same steps with different proportions.
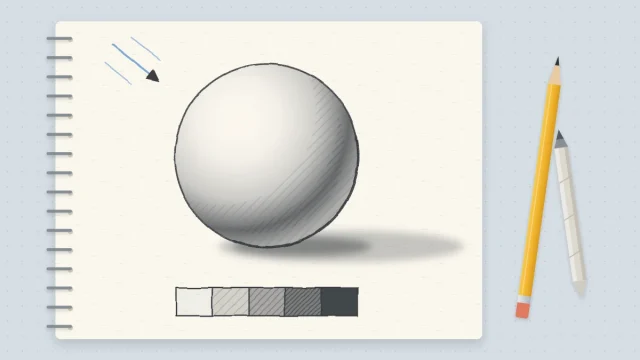
Then give your shapes some depth. A square becomes a cube and a circle becomes a sphere with a few extra lines, as explained in the guide to drawing 3D shapes.
Frequently asked questions
Why can't I draw a round circle freehand?
Freehand circles are hard for everyone. Small finger movements create flat spots, so move from the elbow or shoulder, rehearse the motion above the paper first, and go around twice lightly. Two overlapping passes even each other out, and you can darken the better curve afterward.
Do I have to erase construction lines?
No. If they were drawn lightly, construction lines can stay faintly visible under the final outline, and many sketches look livelier that way. Erase them only where they distract. This is why the early shapes should be so pale: light lines give you the choice.
How long should I practice shapes before drawing real objects?
You can do both from the first day. Spend a few minutes on plain shapes as a warm-up, then use them straight away to block in a simple object such as a mug or a teapot. Using shapes in a real sketch is the best practice for them.