How to Draw a Pumpkin: A Simple Fall Sketch With Shading
A ribbed pumpkin in five steps, from a flattened oval to a twisted stem and curling vine, with shading in the grooves, a cast shadow and four easy variations.
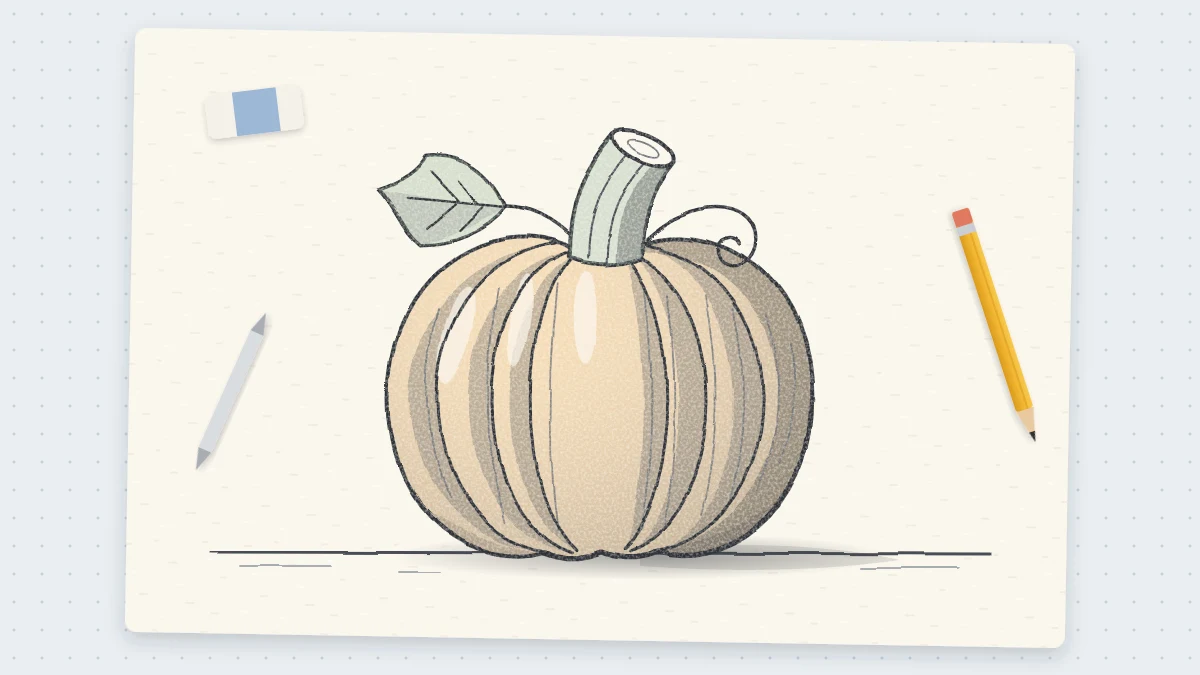
This drawing at a glance
What you need
- HB pencil
- 2B pencil
- Soft eraser
- Plain paper
- Blending stump or tissue (optional)
When the weather cools, a pumpkin is the obvious thing to sketch. It is round, forgiving and full of gentle curves, so it suits a fall card, a journal page or a quiet half hour with a sketchbook.
Here is how to draw a pumpkin in five steps, starting with one flattened oval and finishing with a twisted stem and a curling vine. A little shading in the grooves afterward makes the ribs look plump and round.
What You Need
- An HB pencil for the light sketch
- A 2B pencil for final lines and shading
- A soft eraser
- Plain paper
The Idea: Segments Wrapped Around an Oval
A pumpkin is a slightly squashed ball divided into ribs, a bit like the sections of a peeled orange seen from outside. All the ribs meet at a small dip on top, where the stem grows, and again underneath.
That is why the segment lines are never straight. The center rib faces you, so it looks like a tall narrow oval. The ribs beside it curve away, so their lines bow outward like parentheses, more strongly the closer they get to the sides.
How to Draw the Pumpkin in Five Steps
Keep the first four steps light. They are construction lines, and parts of the first oval will be erased.
- Draw a wide flattened oval. Make it about 4 in (10 cm) wide and roughly three-quarters as tall. Sketch it loosely, going around two or three times, and keep the bottom a touch flatter than the top.
- Mark the dip at the top. Just below the top edge, in the center, draw a small flat oval about one-fifth the width of the pumpkin. This is where the stem will sit, and where every segment line begins.
- Draw the center segment. From the dip down to the bottom edge, draw a tall narrow oval, about one-quarter the width of the pumpkin. Its top tucks into the dip and its bottom touches the base.
- Add the side segments. On each side of the center, draw two curved lines running from the dip to the bottom. Each one bows outward, and the outer pair bows more than the inner pair. Where each line meets the top and bottom of the outline, nudge the outline into a small notch, so the edge becomes a row of soft bumps.
- Draw the stem. Rising from the dip, draw two lines that lean to one side and curve slightly, wider at the base than at the tip. The stem should be thick, about as wide as the dip. Close the top with a small flat oval for the cut end, and add two or three lines along its length that twist a little.
To finish the outline, add a vine: one long line that leaves the base of the stem, loops into a loose spiral, and carries a single broad leaf with a jagged edge and a center vein. Then go over the lines you want to keep with the 2B pencil.
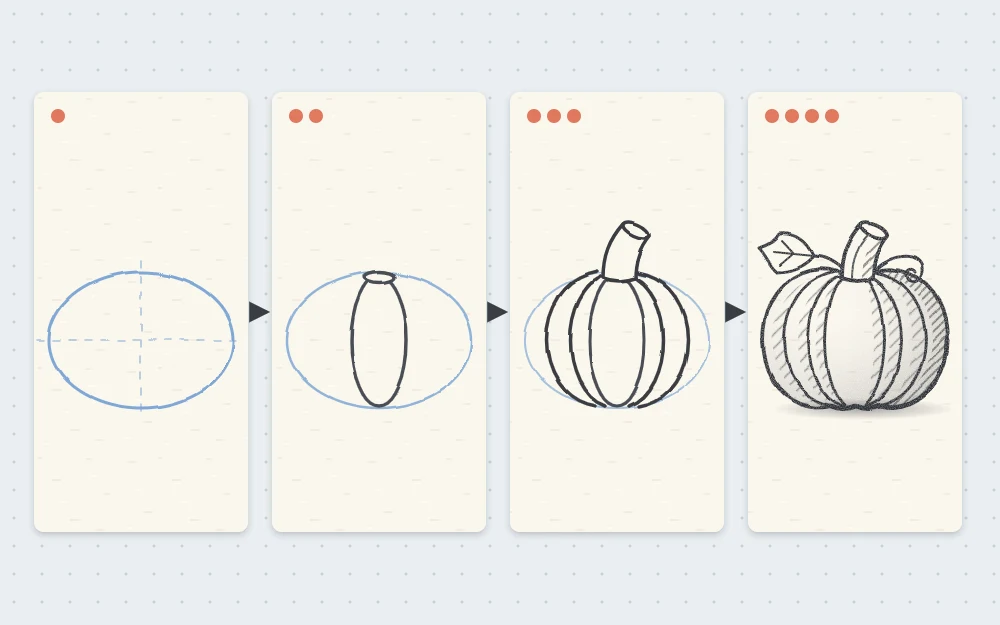
Here is the proportion check: the stem is about one-quarter the height of the pumpkin, and the center segment is the widest rib you can see. Ribs get narrower toward the sides because they are turning away from you.
Tip
Draw the segment lines in pairs, one on the left and its partner on the right, before moving outward. Matching them as you go keeps the pumpkin balanced.
Shade the Grooves So the Ribs Look Round
An outlined pumpkin looks flat until the grooves go dark. Each rib is a small rounded form of its own, lightest along its middle and darkest where it dips to meet its neighbor.
- With the 2B pencil, darken each segment line slightly, pressing hardest near the top dip and the base.
- Shade a soft band of tone on both sides of each groove, fading toward the middle of the rib. Use short curved strokes that follow the rib from top to bottom.
- Leave a strip of clean paper down the center of each rib as a highlight.
- Choose a light direction, for example the upper left, and deepen the tone across the ribs on the opposite side.
Shade one side of the stem and the lower half of the dip as well. If you want more control over smooth tone, the guide to simple shading techniques explains hatching, blending and building value in layers.
Add a Cast Shadow
A pumpkin is heavy, and a shadow shows that weight. Draw a short ground line behind it, then add a flat oval of tone under the base, stretching away from the light. Make it darkest right where the pumpkin touches the ground and let it fade at the far edge.
Fixing Common Problems
- It looks like a beach ball. The segment lines are evenly spaced. Make the center rib widest and the ribs narrower toward each side.
- It looks flat. The lines are too straight. Bow them outward more, especially the outer pair.
- The stem looks stuck on. Let its base flare out and overlap the dip, and shade the dip around it.
Common mistake
Drawing a thin, straight stem. A real pumpkin stem is chunky, ridged and usually bent, and a thick one gives the sketch much more life.
Pumpkin Variations to Try
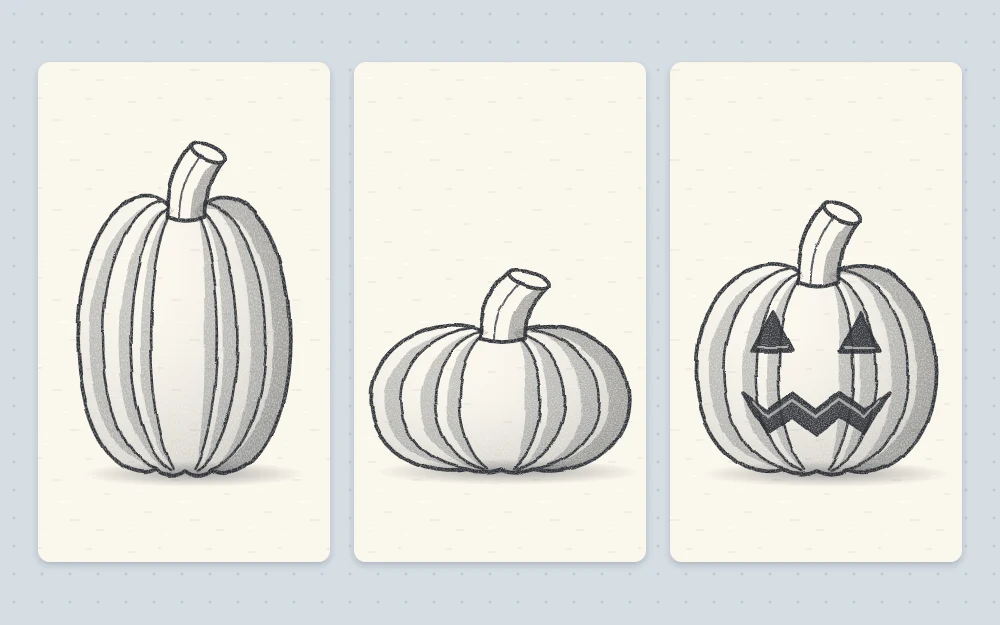
Change the first oval and you get a different pumpkin with the same steps.
- Tall. Begin with an upright oval, taller than it is wide. The segment lines bow less.
- Squat. Begin with a very wide, low oval, about half as tall as it is wide, with a deep dip.
- Tiny. Draw one only 1 in (2.5 cm) across with just three ribs. A row of these makes a good page border.
- Carved face. Add two plain triangle eyes and a zigzag mouth. Draw them over the segment lines, then erase the lines inside each shape and shade the openings dark.
What to Draw Next
The rounded forms and soft shading you used here carry straight over to apples, pears and oranges, so the lesson on how to draw fruit is a natural next step.
For another seasonal page, save this easy snowman drawing for winter. It is built from stacked circles and uses the same light shading to make white shapes look round.
Frequently asked questions
How many segments should a pumpkin drawing have?
Five to seven visible ribs work well for a medium sketch: one in the center and two or three on each side. More than that crowds a small drawing. For a tiny pumpkin, three ribs are enough to make the shape clear.
How do you make a pumpkin look round instead of flat?
Curve the segment lines outward so they follow the surface, and make the ribs narrower toward the sides. Then darken the grooves and leave a pale strip along the middle of each rib. The contrast between dark grooves and light ridges creates the rounded look.
Can this pumpkin be drawn with colored pencils?
Yes. Sketch it lightly in HB first, then layer orange over the ribs, leaving the highlights pale. Use a darker orange or brown in the grooves and on the shadow side, and a dull green or brown for the stem. Keep the pencil pressure light and build color gradually.
